高橋かずひとのプログラミング、その他、備忘録。

日々調べてたことや、作ってみたものをメモしているブログ。 お決まりの断り文句ですが、このブログに書かれている内容は個人の見解であり、所属する組織の公式見解ではありません。チラ裏。

【Ubuntu】【Python】dlibを用いた物体追跡

OpneCVの物体追跡はちょくちょくサンプルを動かしたことがるのだけど、
dlibは動かしたことがなかったため、ちょっとお試し。

モーションブラーとかにも付いて行ってて、結構性能良さそうな感じ。

動画は以下。
youtu.be


ソースコードは以下。

#!/usr/bin/env python
# -*- coding: utf-8 -*-

'''
correlation_tracker.py.

Usage:
  correlation_tracker.py [<video source>] [<resize rate>]
'''

import sys
import dlib
import cv2
import time
import copy

# マウスイベントハンドラ
mouse_start_x, mouse_start_y = 0, 0
mouse_end_x, mouse_end_y = 0, 0
selecting = False
tracker_start_flag = False
tracking_flag = False
def select_roi(event,x,y,flags,param):
    global selecting, tracker_start_flag
    global mouse_start_x, mouse_start_y
    global mouse_end_x, mouse_end_y
    if event == cv2.EVENT_LBUTTONDOWN:
        selecting = True
        mouse_start_x, mouse_start_y = x,y

    elif event == cv2.EVENT_MOUSEMOVE:
        if selecting == True:
            mouse_end_x, mouse_end_y = x, y
        else:
            pass
    elif event == cv2.EVENT_LBUTTONUP:
        mouse_end_x, mouse_end_y = x, y
        selecting = False
        tracker_start_flag = True

# 引数解釈
try:
    fn = sys.argv[1]
    if fn.isdigit() == True:
        fn = int(fn)
except:
    fn = 0
try:
    resize_rate = sys.argv[2]
    resize_rate = int(resize_rate)
except:
    resize_rate = 1

# トラッカー生成
tracker = dlib.correlation_tracker()

video_input = cv2.VideoCapture(fn)
if (video_input.isOpened() == True):
    ret, frame = video_input.read()
    cv2.imshow('correlation tracker', frame)
    cv2.setMouseCallback('correlation tracker', select_roi)

camera_fps = 30
frame_width, frame_height = 640, 480
video_input.set(cv2.CAP_PROP_FPS, camera_fps)            # カメラFPSを設定
video_input.set(cv2.CAP_PROP_FRAME_WIDTH, frame_width)   # カメラ画像の横幅を設定
video_input.set(cv2.CAP_PROP_FRAME_HEIGHT, frame_height) # カメラ画像の縦幅を設定

while(video_input.isOpened() == True):
    ret, frame = video_input.read()
    temp_frame = copy.deepcopy(frame)

    # 処理負荷軽減のための対象フレーム縮小(引数指定時)
    height, width = frame.shape[:2]
    temp_frame = cv2.resize(frame, (int(width/resize_rate), int(height/resize_rate)))

    if tracker_start_flag == True:
        # 追跡開始
        tracker.start_track(temp_frame, dlib.rectangle(mouse_start_x, mouse_start_y, mouse_end_x, mouse_end_y))
        tracking_flag = True
        tracker_start_flag = False
    elif tracking_flag == True:
        # 追跡更新
        tracker.update(temp_frame)

    # 描画
    if selecting == True:
        cv2.rectangle(frame, (mouse_start_x, mouse_start_y), (mouse_end_x, mouse_end_y), (0, 0, 255), 2)
    if tracking_flag == True:
        tracking_point = tracker.get_position()
        tracking_point_x1 = int(tracking_point.left())
        tracking_point_y1 = int(tracking_point.top())
        tracking_point_x2 = int(tracking_point.right())
        tracking_point_y2 = int(tracking_point.bottom())
        cv2.rectangle(frame, (tracking_point_x1, tracking_point_y1), (tracking_point_x2, tracking_point_y2), (0, 0, 255), 2)

    cv2.imshow('correlation tracker', frame)

    c = cv2.waitKey(int(1000/camera_fps)) & 0xFF

    if c==27: # ESC
        break
【Ubuntu】【Python】dlibを用いて顔器官検出

今のところdlibにはあって、OpenCVには無い顔器官検出。

とりあえず、無理やり色付けしたけど、もっとスマートな方法があるはず。
というか、リファレンスをしっかり読み込んでいないだけだと思いますが。。。

動画は以下。
顔を出すのは恥ずかしいので顔検出を用いて隠しております。
youtu.be


ソースコードは以下。
動作させるには、pyファイルと同じディレクトリに顔器官の学習済みデータを
配置する必要があります。
→shape_predictor_68_face_landmarks.dat(http://dlib.net/files/shape_predictor_68_face_landmarks.dat.bz2

#!/usr/bin/env python
# -*- coding: utf-8 -*-

'''
face_landmark_detector.py.

Usage:
  face_landmark_detector.py [<video source>] [<resize rate>] [<privacy mask>]
'''

import sys
import dlib
import cv2
import time
import copy

try:
    fn = sys.argv[1]
    if fn.isdigit() == True:
        fn = int(fn)
except:
    fn = 0

try:
    resize_rate = sys.argv[2]
    resize_rate = int(resize_rate)
except:
    resize_rate = 1

try:
    privacy_mask = sys.argv[3]
    privacy_mask = int(privacy_mask)
except:
    privacy_mask = 0

predictor_path = "./shape_predictor_68_face_landmarks.dat"

detector = dlib.get_frontal_face_detector()
predictor = dlib.shape_predictor(predictor_path)

video_input = cv2.VideoCapture(fn)

while(video_input.isOpened() == True):
    ret, frame = video_input.read()
    temp_frame = copy.deepcopy(frame)

    # 処理負荷軽減のための対象フレーム縮小(引数指定時)
    height, width = frame.shape[:2]
    temp_frame = cv2.resize(frame, (int(width/resize_rate), int(height/resize_rate)))

    # 顔検出
    start = time.time()
    dets = detector(temp_frame, 1)
    elapsed_time = time.time() - start
    print ("detector processing time:{0}".format(elapsed_time)) + "[sec]"

    for k, d in enumerate(dets):
        print("Detection {}: Left: {} Top: {} Right: {} Bottom: {}".format(
            k, d.left(), d.top(), d.right(), d.bottom()))

        # 顔器官検出
        start = time.time()
        shape = predictor(temp_frame, d)
        elapsed_time = time.time() - start
        print ("predictor processing time:{0}".format(elapsed_time)) + "[sec]"

        # 描画
        rect_offset = 20
        if privacy_mask == 1:
            cv2.rectangle(frame, (int(d.left() * resize_rate) - rect_offset, int(d.top() * resize_rate) - rect_offset), \
                (int(d.right() * resize_rate) + rect_offset, int(d.bottom() * resize_rate) + rect_offset), (255, 255, 255), -1)

        for shape_point_count in range(shape.num_parts):
            shape_point = shape.part(shape_point_count)
            if shape_point_count < 17: # [0-16]:輪郭
                cv2.circle(frame, (int(shape_point.x * resize_rate), int(shape_point.y * resize_rate)), 2, (0, 0, 255), -1)
            elif shape_point_count < 22: # [17-21]眉(右)
                cv2.circle(frame, (int(shape_point.x * resize_rate), int(shape_point.y * resize_rate)), 2, (0, 255, 0), -1)
            elif shape_point_count < 27: # [22-26]眉(左)
                cv2.circle(frame, (int(shape_point.x * resize_rate), int(shape_point.y * resize_rate)), 2, (255, 0, 0), -1)
            elif shape_point_count < 31: # [27-30]鼻背
                cv2.circle(frame, (int(shape_point.x * resize_rate), int(shape_point.y * resize_rate)), 2, (0, 255, 255), -1)
            elif shape_point_count < 36: # [31-35]鼻翼、鼻尖
                cv2.circle(frame, (int(shape_point.x * resize_rate), int(shape_point.y * resize_rate)), 2, (255, 255, 0), -1)
            elif shape_point_count < 42: # [36-4142目47)
                cv2.circle(frame, (int(shape_point.x * resize_rate), int(shape_point.y * resize_rate)), 2, (255, 0, 255), -1)
            elif shape_point_count < 48: # [42-47]目(左)
                cv2.circle(frame, (int(shape_point.x * resize_rate), int(shape_point.y * resize_rate)), 2, (0, 0, 128), -1)
            elif shape_point_count < 55: # [48-54]上唇(上側輪郭)
                cv2.circle(frame, (int(shape_point.x * resize_rate), int(shape_point.y * resize_rate)), 2, (0, 128, 0), -1)
            elif shape_point_count < 60: # [54-59]下唇(下側輪郭)
                cv2.circle(frame, (int(shape_point.x * resize_rate), int(shape_point.y * resize_rate)), 2, (128, 0, 0), -1)
            elif shape_point_count < 65: # [60-64]上唇(下側輪郭)
                cv2.circle(frame, (int(shape_point.x * resize_rate), int(shape_point.y * resize_rate)), 2, (0, 128, 255), -1)
            elif shape_point_count < 68: # [65-67]下唇(上側輪郭)
                cv2.circle(frame, (int(shape_point.x * resize_rate), int(shape_point.y * resize_rate)), 2, (128, 255, 0), -1)

    cv2.imshow('face landmark detector', frame)

    c = cv2.waitKey(50) & 0xFF

    if c==27: # ESC
        break

video_input.release()
cv2.destroyAllWindows()

以上。

【Ubuntu】【Python】dlibとOpenCVの顔検出比べ

dlibとOpenCVの顔検出比較をしてみました。
時々見かける動画ですが、自分でもやってみたかったので、ちょっとお試し。

dlibのほうが向きとかに対する精度がよくて、
OpenCVのほうが早い感じ(Adaboostのおかげ?
業務で使用することになったら、もっと詳細に調査予定。

Linuxのほうがdlibの導入が簡単なので、Ubutntuでやってます。
Windowsでもdlibいれれば同じソースで動くはず。。。?

動画は以下。
赤色がOpenCVによる検出で、青色がdlibによる検出です。
youtu.be


ソースコードは以下。
動作させるには、pyファイルと同じディレクトリにOpenCVの学習済みデータを
配置する必要があります。
→./data/haarcascades/haarcascade_frontalface_alt.xml

#!/usr/bin/env python
# -*- coding: utf-8 -*-

'''
face_landmark_detector.py.

Usage:
  face_landmark_detector.py [<video source>] [<resize rate>]
'''

import sys
import dlib
import cv2
import time
import copy

try:
    fn = sys.argv[1]
    if fn.isdigit() == True:
        fn = int(fn)
except:
    fn = 0

try:
    resize_rate = sys.argv[2]
    resize_rate = int(resize_rate)
except:
    resize_rate = 1

# Dlib
detector = dlib.get_frontal_face_detector()

# OpenCV
cascade_fn = "./data/haarcascades/haarcascade_frontalface_alt.xml"
cascade = cv2.CascadeClassifier(cascade_fn)

video_input = cv2.VideoCapture(fn)

total_frame_count = 0
face_detection_frame_count_dlib = 0
face_detection_frame_count_opencv = 0

while(video_input.isOpened() == True):
    total_frame_count += 1

    ret, frame = video_input.read()
    temp_frame = copy.deepcopy(frame)

    # 処理負荷軽減のための対象フレーム縮小(引数指定時)
    height, width = frame.shape[:2]
    temp_frame = cv2.resize(frame, (int(width/resize_rate), int(height/resize_rate)))

    # 顔検出(dlib)
    start = time.time()
    dets = detector(temp_frame, 1)
    elapsed_time_dlib = time.time() - start

    if len(dets) > 0:
        face_detection_frame_count_dlib += 1

    # 検出結果描画(dlib)
    for k, d in enumerate(dets):
        cv2.rectangle(frame, (int(d.left() * resize_rate), int(d.top() * resize_rate)), \
            (int(d.right() * resize_rate), int(d.bottom() * resize_rate)), (255, 0, 0), -1)

    # 顔検出(opencv)
    gray_image = cv2.cvtColor(temp_frame, cv2.COLOR_BGR2GRAY)
    gray_image = cv2.equalizeHist(gray_image)

    start = time.time()
    rects = cascade.detectMultiScale(gray_image, scaleFactor=1.3, minNeighbors=4, minSize=(30, 30), flags=cv2.CASCADE_SCALE_IMAGE)
    if len(rects) == 0:
        rects = []
    else:
        rects[:,2:] += rects[:,:2]
    elapsed_time_opencv = time.time() - start


    if len(rects) > 0:
        face_detection_frame_count_opencv += 1

    # 検出結果描画(OpenCV)
    for x1, y1, x2, y2 in rects:
        cv2.putText(frame, "OpenCV", (int(x1 * resize_rate), int(y1 * resize_rate)), cv2.FONT_HERSHEY_PLAIN, 2.0, (0, 0, 255), thickness = 2)
        cv2.rectangle(frame, (int(x1 * resize_rate), int(y1 * resize_rate)), (int(x2 * resize_rate), int(y2 * resize_rate)), (0, 0, 255), -1)
    # 検出結果描画(dlib)
    for k, d in enumerate(dets):
        cv2.putText(frame, "Dlib", (int(d.left() * resize_rate), int(d.top() * resize_rate)), cv2.FONT_HERSHEY_PLAIN, 2.0, (255, 0, 0), thickness = 2)
        cv2.rectangle(frame, (int(d.left() * resize_rate), int(d.top() * resize_rate)), \
            (int(d.right() * resize_rate), int(d.bottom() * resize_rate)), (255, 0, 0), 2)

    print ("face detect(dlib) processing time:{0}".format(elapsed_time_dlib)) + "[sec]"
    print ("face detect(opencv) processing time:{0}".format(elapsed_time_opencv)) + "[sec]"
    print ("face detect(dlib) success count:" + '%06d' % face_detection_frame_count_dlib + "/" + '%06d' % total_frame_count)
    print ("face detect(opencv) success count:" + '%06d' % face_detection_frame_count_opencv + "/" + '%06d' % total_frame_count)
    print

    cv2.imshow('face detector vs', frame)

    c = cv2.waitKey(50) & 0xFF

    if c==27: # ESC
        break

video_input.release()
cv2.destroyAllWindows()

以上。

【Python】連番の画像ファイルをOpenCVで簡単に読み込む

前回の記事で吐き出したような連番ファイルを読み込む方法メモ。
kazuhito00.hatenablog.com

VideoCaptureに変換指定子を利用した構文で渡せます。
下のソースコードの例では、00000.jpg,00001.jpg,00002.jpg … と順に読み込みます。

#!/usr/bin/env python
# -*- coding: utf-8 -*-

import cv2

print(__doc__)

video_input = cv2.VideoCapture("%05d.jpg")

while(video_input.isOpened() == True):
    ret, frame = video_input.read()

    cv2.imshow('frame', frame)
    c = cv2.waitKey(50) & 0xFF
    if c==27: # ESC
        break

video_input.release()
cv2.destroyAllWindows()

C++版だとこんな感じ↓

cv::VideoCapture capture("%05d.jpg");

以上。

【Python】OpenCVで取り込んだビデオデータを連番のjpgファイルで保存

正直、フリーツールとか探せばもっと良いのがゴロゴロしてると思う。
仕事とか迂闊にフリーツールを入れれない環境とかで、
毎回似たようなものを作成しているので、備忘録的に記載。

第1引数にビデオソース。
 →Webカメラにアクセスする際は、0-9の数字を指定。
  動画ファイルにアクセスするときは、相対か絶対パスで動画ファイルを指定。
第2引数にフレームレート。
 →表示する際のフレームレート。cv2.waitKey()の待ち時間を変更しているだけの手抜き処理。
第3引数に縮小率。
 →吐き出すjpgファイルのサイズを変更する際に指定。
  2を指定すると1/2の横縦幅の画像に。

#!/usr/bin/env python
# -*- coding: utf-8 -*-

'''
video2jpg.py.

Usage:
  video2jpg.py [<video source>] [<fps>] [<resize_rate>]
'''

import numpy as np
import cv2
import sys

print(__doc__)

try:
    fn = sys.argv[1]
    if fn.isdigit() == True:
        fn = int(fn)
except:
    fn = 0
print fn

try:
    fps = sys.argv[2]
    fps = int(fps)
except:
    fps = 30
print fps

try:
    resize_rate = sys.argv[3]
    resize_rate = int(resize_rate)
except:
    resize_rate = 1
print resize_rate

video_input = cv2.VideoCapture(fn)
if (video_input.isOpened() == False):
    exit()

count = 0
while(True):
    count += 1
    count_padded = '%05d' % count

    ret, frame = video_input.read()

    height, width = frame.shape[:2]
    small_frame = cv2.resize(frame, (int(width/resize_rate), int(height/resize_rate)))

    cv2.imshow('frame', small_frame)
    c = cv2.waitKey(int(1000/fps)) & 0xFF

    write_file_name = count_padded + ".jpg"
    cv2.imwrite(write_file_name, small_frame)

    if c==27: # ESC
        break

video_input.release()
cv2.destroyAllWindows()

以上。

【Windows】DroidCamを利用してスマホをWebカメラ化 + セルカレンズ

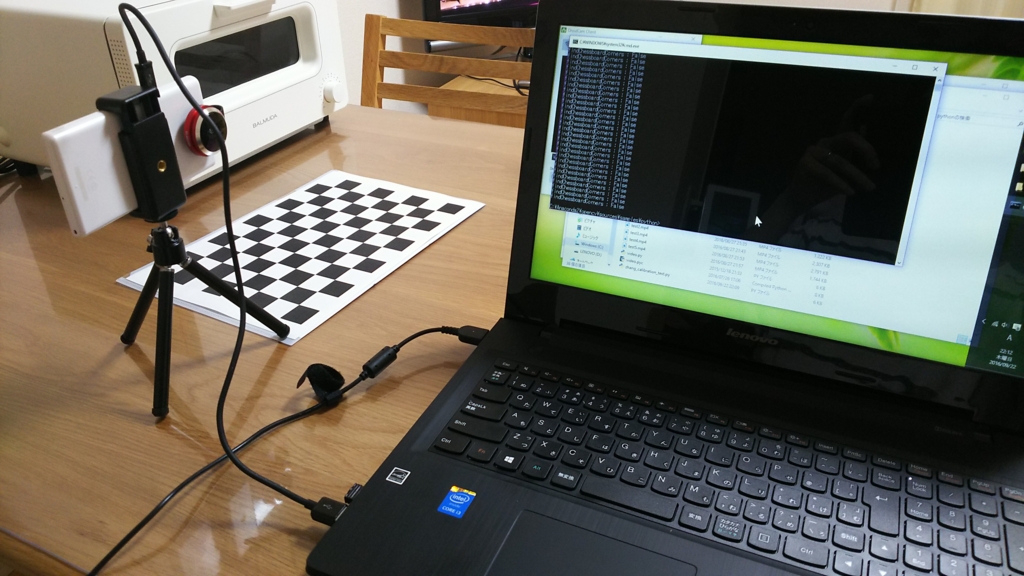
DroidCamを利用してスマホをWeb化したものをキャリブレーションしてみました。

■事前準備
 ① Google Playにて「DroidCam Wireless Webcam」をインストール
 ② DEV47APPSから「DroidCam Client」をダウンロード/インストール
 ひとまず、USB接続で接続↓ 撮影者が映っとる。。。
f:id:Kazuhito00:20160922231444j:plain

■DroidCam + スマホ

■DroidCam + スマホ + セルカレンズ(広角235度)

一つ前の記事でUSB接続の魚眼レンズWebカメラを利用したのだけど、
趣味で動かす分には、DroidCam + スマホ + セルカレンズが気楽で取り回しやすい感じ。

以上。

【Windows】【Python】 OpenCVで魚眼レンズのカメラキャリブレーション

最近Pythonのコードの書きやすさに魅力を感じて、結構Pythonでサンプルプログラムとか書いてます。

で、表題の件。
この先仕事で魚眼とか超広角レンズを利用するかもしれないので、お試しサンプルを作ろうとしたら、
C++OpenCVに存在する cv::fisheye系のI/FがPython版には無いらしい。。。

しかたなく、色々諦めきれなかったので、Pythonで通常のキャリブレーションの手番を踏んで、
魚眼レンズをキャリブレーションしてみました。
Python版で出来たら、C++版でちゃんとした実装すれば技術的には問題無いでしょう理論

あれ?なんか普通に出来てる? 理由要確認。
あと、気持ち切り取られている箇所多いような気がしないでもない。
たぶん広角130度くらい確保出来ている。

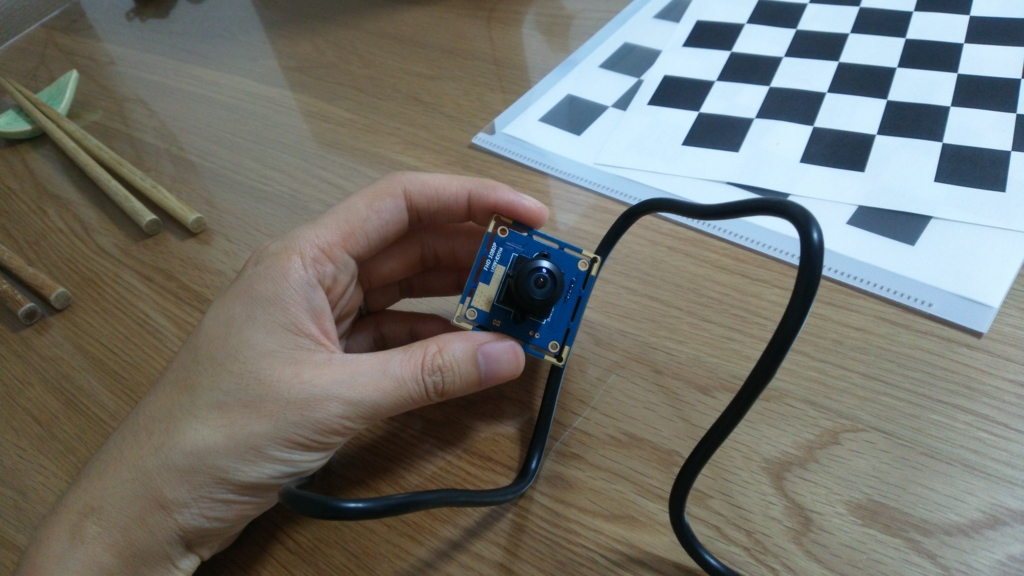
ちなみに使用したカメラは以下↓
https://www.amazon.co.jp/ELP-USB2-0-Ominivison-OV2710-%E5%BA%A6%E3%83%A1%E3%82%AC%E3%83%94%E3%82%AF%E3%82%BB%E3%83%AB%E9%AD%9A%E7%9C%BC%E3%83%AC%E3%83%B3%E3%82%BA/dp/B017R02JLI
f:id:Kazuhito00:20160922210510j:plain

コードも以下に貼り付け↓

#!/usr/bin/env python
# -*- coding: utf-8 -*-

import numpy as np
import cv2
import Tkinter
import tkMessageBox

square_side_length = 23.0 # チェスボード内の正方形の1辺のサイズ(mm)
grid_intersection_size = (10, 7) # チェスボード内の格子数

pattern_points = np.zeros( (np.prod(grid_intersection_size), 3), np.float32 )
pattern_points[:,:2] = np.indices(grid_intersection_size).T.reshape(-1, 2)
pattern_points *= square_side_length
object_points = []
image_points = []

root = Tkinter.Tk()
root.withdraw()

video_input = cv2.VideoCapture(1)
if (video_input.isOpened() == False):
    exit()

camera_mat, dist_coef = [], []

if tkMessageBox.askyesno('askyesno','キャリブレーションデータ(K.csv, d.csv)を読み込みますか?'):
    # キャリブレーションデータの読み込み
    camera_mat = np.loadtxt('K.csv', delimiter=',')
    dist_coef = np.loadtxt('d.csv', delimiter=',')
    print "K = \n", camera_mat
    print "d = ", dist_coef.ravel()
else:
    # チェスボードの撮影
    capture_count = 0
    while(True):
        ret, frame = video_input.read()

        # チェスボード検出用にグレースケール画像へ変換
        #grayscale_image = cv2.cvtColor(frame, cv2.COLOR_RGB2GRAY)

        # チェスボードのコーナーを検出
        #found, corner = cv2.findChessboardCorners(grayscale_image, grid_intersection_size)
        found, corner = cv2.findChessboardCorners(frame, grid_intersection_size)

        if found == True:
            print 'findChessboardCorners : True'

            # 現在のOpenCVではfindChessboardCorners()内で、cornerSubPix()相当の処理が実施されている?要確認
            #term = (cv2.TERM_CRITERIA_EPS + cv2.TERM_CRITERIA_COUNT, 30, 0.1)
            #cv2.cornerSubPix(grayscale_image, corner, (5,5), (-1,-1), term)
            #cv2.drawChessboardCorners(grayscale_image, grid_intersection_size, corner, found)

            cv2.drawChessboardCorners(frame, grid_intersection_size, corner, found)
        if found == False:
            print 'findChessboardCorners : False'

        cv2.putText(frame, "Enter:Capture Chessboard(" + str(capture_count) + ")", (100, 50), cv2.FONT_HERSHEY_SIMPLEX, 0.4, (0,0,255), 1)
        cv2.putText(frame, "N    :Completes Calibration Photographing", (100, 75), cv2.FONT_HERSHEY_SIMPLEX, 0.4, (0,0,255), 1)
        cv2.putText(frame, "ESC  :terminate program", (100, 100), cv2.FONT_HERSHEY_SIMPLEX, 0.4, (0,0,255), 1)
        #cv2.putText(grayscale_image, "Enter:Capture Chessboard(" + str(capture_count) + ")", (100, 50), cv2.FONT_HERSHEY_SIMPLEX, 0.4, (0,0,255), 1)
        #cv2.putText(grayscale_image, "ESC  :Completes Calibration Photographing.", (100, 75), cv2.FONT_HERSHEY_SIMPLEX, 0.4, (0,0,255), 1)
        cv2.imshow('original', frame)
        #cv2.imshow('findChessboardCorners', grayscale_image)

        c = cv2.waitKey(50) & 0xFF
        if c == 13 and found == True: # Enter
            # チェスボードコーナー検出情報を追加
            image_points.append(corner)
            object_points.append(pattern_points)
            capture_count += 1
        if c == 110: # N
            if tkMessageBox.askyesno('askyesno','チェスボード撮影を終了し、カメラ内部パラメータを求めますか?'):
                cv2.destroyAllWindows()
                break
        if c == 27: # ESC
            if tkMessageBox.askyesno('askyesno','プログラムを終了しますか?'):
                video_input.release()
                cv2.destroyAllWindows()
                exit()

    if len(image_points) > 0:
        # カメラ内部パラメータを計算
        print 'calibrateCamera() start'
        rms, K, d, r, t = cv2.calibrateCamera(object_points,image_points,(frame.shape[1],frame.shape[0]),None,None)
        print "RMS = ", rms
        print "K = \n", K
        print "d = ", d.ravel()
        np.savetxt("K.csv", K, delimiter =',',fmt="%0.14f") #カメラ行列の保存
        np.savetxt("d.csv", d, delimiter =',',fmt="%0.14f") #歪み係数の保存

        camera_mat = K
        dist_coef = d

        # 再投影誤差による評価
        mean_error = 0
        for i in xrange(len(object_points)):
            image_points2, _ = cv2.projectPoints(object_points[i], r[i], t[i], camera_mat, dist_coef)
            error = cv2.norm(image_points[i], image_points2, cv2.NORM_L2) / len(image_points2)
            mean_error += error
        print "total error: ", mean_error/len(object_points) # 0に近い値が望ましい(魚眼レンズの評価には不適?)
    else:
        print "findChessboardCorners() not be successful once"

# 歪み補正画像表示
if camera_mat != []:
    while(True):
        ret, frame = video_input.read()
        undistort_image = cv2.undistort(frame, camera_mat, dist_coef)

        cv2.imshow('original', frame)
        cv2.imshow('undistort', undistort_image)
        c = cv2.waitKey(50) & 0xFF
        if c==27: # ESC
            break

video_input.release()
cv2.destroyAllWindows()

以上。